Contact
Close

Just ask!

Choose your Region & Language

Global

North-America

Nordic

Australia

Contact Close

Just ask!

Contact

Rail Monitoring

Rail Road Runner (RRR) – Innovative, simple and quick rail inspection

Measuring Service – We also analyze your track superstructure

Inspection Service – Data collection and documentation using the latest measuring equipment

Rail Inspection Car (RIC) – Collects all the information on the rails’ condition in a continuous process

Measuring, inspection, analysis and advice
Equipment and services for analyzing the condition of rails

If a rail network is going to be cared for effectively and inexpensively, the maintenance planning needs a solid basis: a precise analysis of its current condition. This analysis consists of a number of different inspections and measurements that document rail defects, their severity and their exact position. A comparison with the permitted tolerances given in the applicable standards then provides the basis for determining the best possible rail maintenance procedures. Vossloh has inspection and measuring equipment and vehicles including software and training all available for purchase. Or take advantage of the range of measurement, inspection, results analysis and consultation services we have on offer.

Find out everything about our products, services and the inspection and measuring methods we use from the information that follows.

Top-Features

Highlights

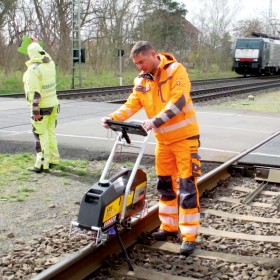
SoniQ Rail Explorer

In addition to the measuring methods and devices for documenting the rail’s longitudinal and transverse profiles, ultrasonic inspections serve to localize operations-related irregularities in the rail’s interior. Thanks to testing electronics and software from the PCUS pro® family, the SRE detects reflectors from volumetric defects on both the gauge corner side and the field side and even deep squats and head checks as well as corrosion in the rail base according to DIN EN 16729-1. The ultrasonic roller unit has nine test probes that insonify the rail from various different angles.

  • Total weight: < 20 kg
  • Measurements in operating mode: 870 mm x 300 mm x 930 mm (L/W/H); transport measurements with the push handle folded down: 1,100 mm x 300 mm x 580 mm (L/W/H).
  • Inspecting from as close as one millimeter, nine probes deliver an accurate picture of the rail’s condition at a testing velocity of 5 km/h
  • No interference with trackside switching equipment
  • Inspections only to be carried out by EN Category 1 inspectors or higher
  • Testing capacity of up to 8 hours
Inspection Service

Vossloh employs the most modern testing and measuring technology together with certified, highly specialized personnel who possess extensive knowledge on all the stages of the rail’s life cycle.

There’s a choice of various testing and inspection methods to detect irregularities in the rail, and special software is used to analyze and prepare the results for interpretation.

Experts then use the data collected as the basis for selecting the most economical maintenance procedure and determining its process parameters.

Vossloh uses the following testing and inspection methods:

Visual inspections
A standard, integral component of rail inspections. Our specialists use their wealth of experience in combination with quick and simple methods to determine the most suitable action. Any abnormalities they notice will then require further testing.

Eddy current testing
An established method for detecting and evaluating surface defects in the running surface and the running edge down to a depth of 2.7 mm. By fully exploiting the probe’s depth range, we can quantitatively determine the crack length and crack depth of head checks very precisely.

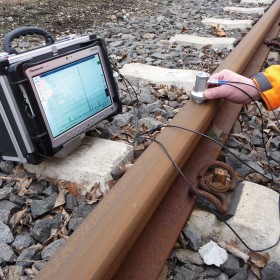
Ultrasonic testing
The most widely used method for detecting internal defects in the rail’s head, web and base. In addition to detecting internal irregularities, our cutting-edge inspection system also detects squats, deep head checks and corrosion in the rail base.

Magnetic particle testing
Magnetic particle testing can detect cracks or bonding flaws in components that can be magnetized, and is used in particular to test the quality of welds.

Magnetic leakage flux testing
This new procedure uses a magnetic field and changes in the flux lines to draw conclusions on the size, shape and position of rail defects. The procedure detects cracks such as head checks or squats down to depths of between 0.4 and 5 mm below the rail surface.

Measuring Service

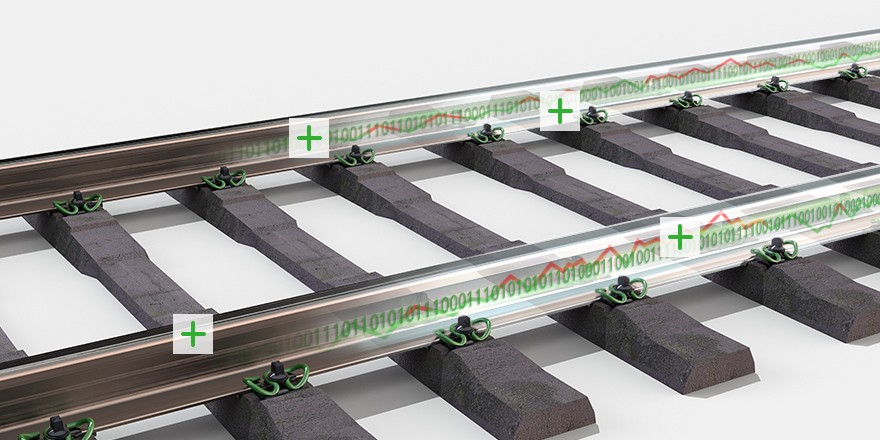
A reliable picture of the rails’ current condition can only be generated once the crack detection results have been supplemented by rail and track geometry measurements. These determine the state of wear on rails, turnouts, crossings, expansion joints etc., which is then compared with the standards, regulations or company-specific target values. These measurements include:

Measuring the cross-sectional profile of the rail head
The contours of the rail head are scanned mechanically and the rail type is identified. The shape of the rail head is then compared with the theoretical profile and any deviations found are quantified. This reveals how much the rail has worn and whether reprofiling is necessary.

Measuring the rail’s longitudinal ripple
Systems for detecting irregularities in the longitudinal profile of the rail’s running surface measure corrugations with wavelengths of between 10 mm and 300mm either localized or continuously depending on the requirements.

Rail and switch measurements
Rail and switch parameters such as track gauge, cant, groove width and distortion are continuously measured and recorded.

Material removal measurements
Localized measurements are carried out at several locations before and after the rails are machined. The difference between the measurement before machining and the measurement after machining determines that amount of material removed. Officially approved measuring equipment and a subsequent statistical evaluation ensure high-quality measurements and evaluation of the material removed.

You’re interested in our Analysis Services? We would be happy to advise you and send you an individual quote. Contact us.

Find out more about our integrated approach to maintenance planning " Smart Maintenance ".

Download

Contact